
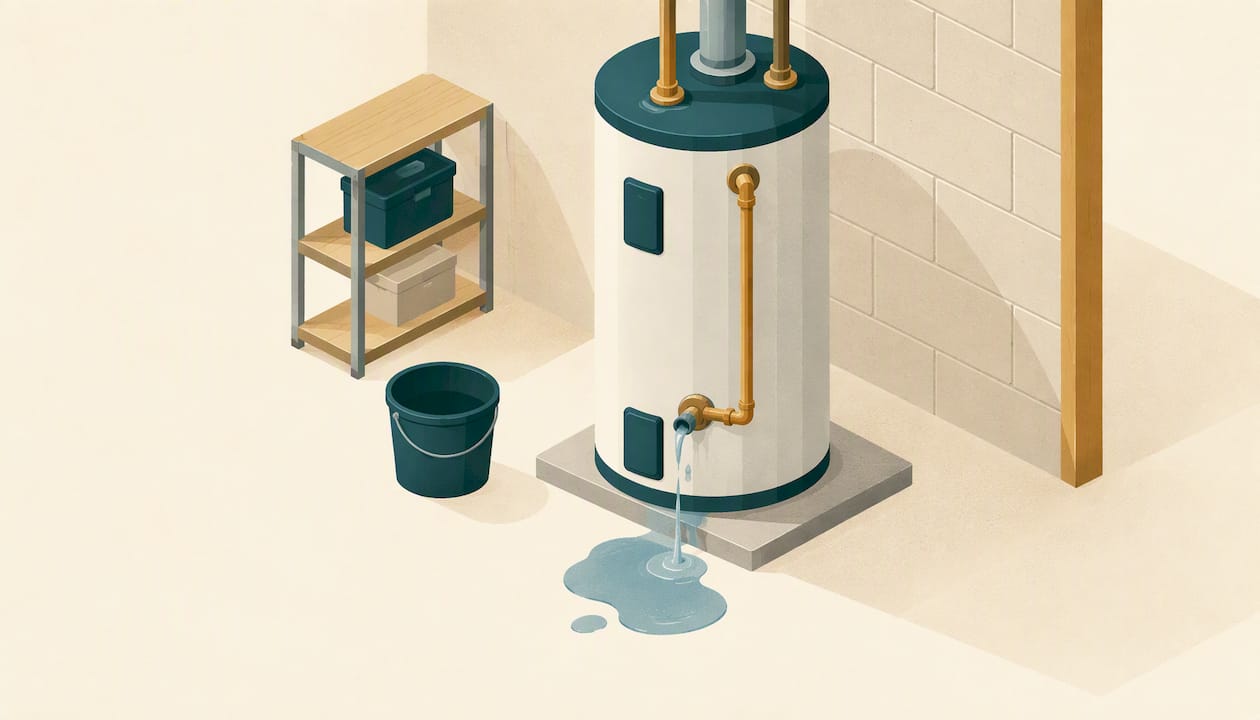
If water is leaking from your water heater, shut off the power or gas and the cold-water supply first, then work out where the water is coming from. A loose fitting or a bad drain valve is a cheap fix. A leak from the bottom of the tank usually is not. This guide walks you through the shutoff, the source check, the repairs a careful homeowner can handle and the point where you should stop and call a pro.
TL;DR
- Turn off the electricity (breaker) or set the gas valve to pilot or off, then close the cold-water valve to the tank. If you smell gas, leave the house and call your gas utility.
- Dry everything with towels and watch for fresh moisture. That tells you whether you have a leak or just condensation, and where it starts.
- Leaks at pipe connections, the drain valve or the temperature-and-pressure (T&P) relief valve are often repairable. Water coming from the tank body or base generally means the tank has failed and needs replacing.
- Stop all DIY work and call a professional if the leak is heavy, near wiring or a gas line, or has soaked a large area.
Table of Contents
- Is a Leaking Water Heater an Emergency?
- What to Do in the First 10 Minutes
- Find Out Where the Water Is Coming From
- Water Leaking From the Bottom of the Water Heater
- Fixes You Can Try Yourself
- How Long Will a Leaking Water Heater Last?
- When to Stop and Call a Professional
- Prevent the Next Leak
- Our Perspective: Fix the Cause, Not Just the Drip
- More Plain-English Fixes for Your Home
- FAQ
- Sources
Is a Leaking Water Heater an Emergency?
Treat it as one until you know otherwise. A. O. Smith, a major water heater manufacturer, says a leak needs attention right away, especially if water is spraying or flowing steadily, or if the leak is near electrical components or a gas line. A steady stream or pressurized spray can spread through flooring, drywall and nearby belongings fast.
A slow drip is less dramatic but still not something to live with. Even small leaks can cause serious water damage, create conditions for mold and point to a problem that will get worse. So the short answer to “can I still shower?” is no. Shut the heater down, and plan on a repair or replacement rather than waiting to see what happens.
There is one more reason not to wait. ENERGY STAR lists leaking joints, seals or seams as signs the system is breaking down, and warns that ignoring failure signs can lead to sudden failure, water damage and an emergency replacement.
What to Do in the First 10 Minutes
Speed matters more than diagnosis here. Do these in order.
- Cut the energy source. For an electric heater, switch off its breaker at the panel. For a gas heater, turn the gas control valve to pilot or off. Servpro’s guidance gives the same sequence to prevent flooding plus electrical or fire hazards.
- Close the cold-water supply. Turn the shutoff valve on the cold inlet pipe at the top of the tank. If it is stuck or missing, use your home’s main water shutoff.
- Check for gas. If you smell gas or aren’t sure about a gas leak, leave immediately and call the gas utility. Don’t flip switches or look for the cause first.
- Contain the water. Put down towels, use a wet/dry vacuum or a mop, and move boxes, laundry and anything else out of the puddle.
- Photograph everything. Take photos and video before you clean up. Kentucky Farm Bureau advises documenting damage for insurance and keeping the damaged unit until an adjuster has seen it if you plan to file a claim.
- Call a plumber if the leak was heavy or you are not comfortable going further.
A note on the water itself: Servpro says most water from a heater leak starts out as clean “Category 1” water, but that can change if it sits and bacteria grow. Dry the area quickly.
Find Out Where the Water Is Coming From
Before you assume the tank is dead, confirm it is actually leaking and pin down the spot. Sweat on cold pipes and condensation on the tank can look a lot like a leak.
Leak or Condensation?
Dry the tank, pipes and floor completely with towels. Then watch. Water that pools and doesn’t evaporate, or that comes back as drips after you wipe it, is likely a real leak. Condensation tends to show up on cold-water pipes and on tanks working hard to heat cold incoming water, then fades once the unit warms up. A paper towel pressed to each suspect spot is a handy test: it shows fresh moisture quickly.
Check the Four Usual Suspects
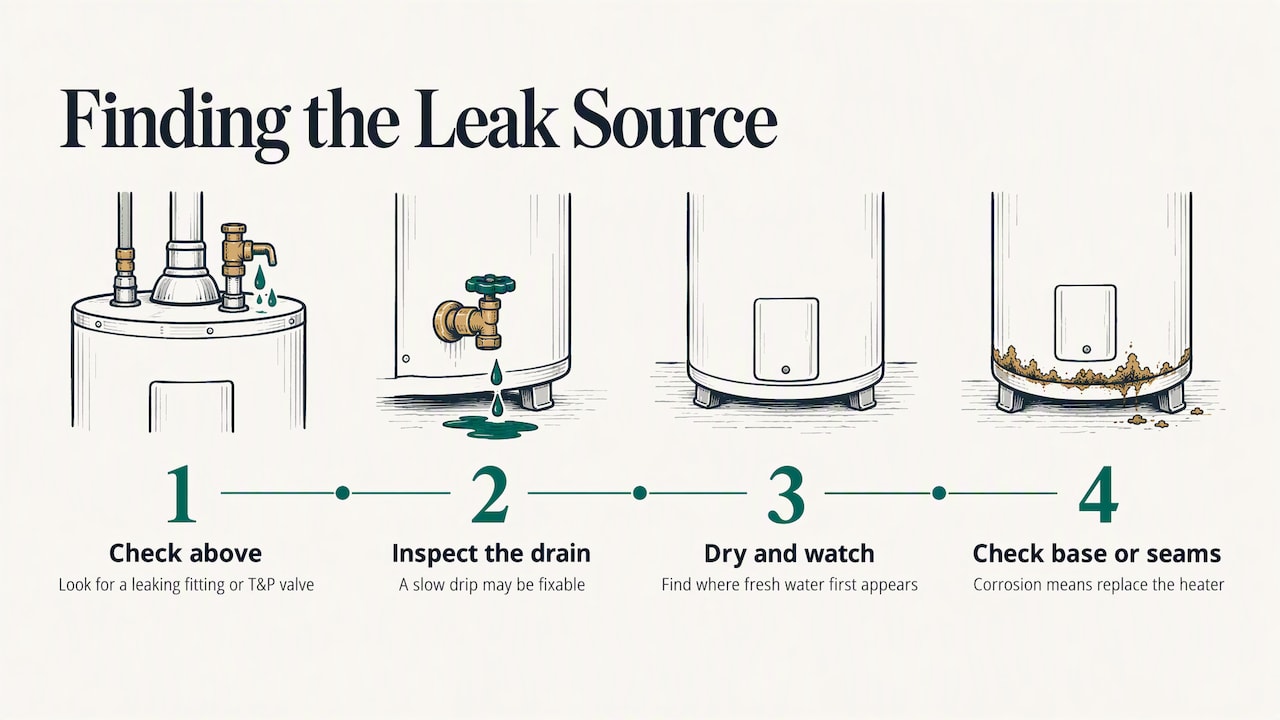
A. O. Smith’s checklist covers the places to inspect: the top inlet and outlet connections, the T&P relief valve, the drain valve near the bottom, and the base of the tank. Use the table below to read what you find.
| Where the water appears | Likely cause | Fixable at home? |
|---|---|---|
| Top, at the inlet or outlet pipes | Loose or worn connection | Often yes: tighten or replace the fitting |
| Side, at the T&P valve or its discharge pipe | Valve is opening or has failed; pressure or temperature may be too high | Replacing the valve is possible, but find the cause first |
| Low on the tank, at the drain valve | Loose or faulty valve | Often yes: tighten or replace |
| Under the tank or from the base | Corroded or cracked tank | No: replace the heater |
This maps to what the manufacturer says: loose pipe connections may need tightening or replacement, a faulty drain valve can be tightened or replaced, and a cracked tank typically requires full replacement.
Water Leaking From the Bottom of the Water Heater
This is the most searched version of the problem, and it needs a careful read, because water on the floor under the heater doesn’t always come from the tank.
First look up. Water can run down the outside of the tank from a leaking fitting or T&P valve at the top and collect underneath. Look at the drain valve too, since a slow drip there is the most fixable cause of a wet base. Dry everything and watch to see where fresh water first appears.
If the water truly comes from the tank base or the seams, that is the bad news case. A leak from the base means corrosion has eaten through the steel, and the whole heater needs replacing. No sealant, epoxy or tightening will hold a pressurized tank together for long, so don’t spend money trying. Keep the heater off and the water supply closed, and start planning the replacement.
Fixes You Can Try Yourself
Be honest about your comfort level. Tightening a fitting is a beginner job. Swapping a drain valve or T&P valve involves draining a hot tank and working with a safety device. If any step feels beyond you, a licensed plumber is the right call.
Step 0: Drain the Tank Safely
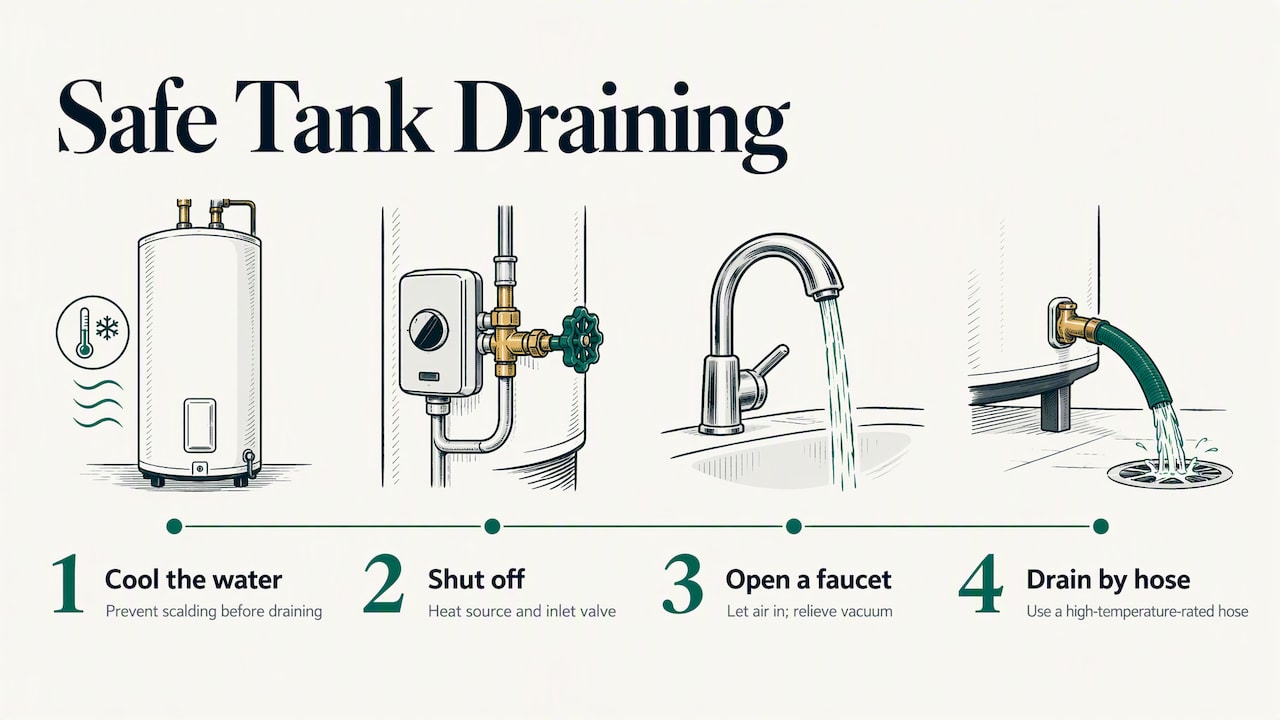
Most valve repairs need the tank at least partly drained. The process, as described in a manufacturer’s installation manual filed with the California Energy Commission, is to shut off the heat source and the inlet valve, open a nearby hot water faucet so air can enter and relieve the vacuum, and use a hose rated for high temperatures. Let the water cool first. Tank water can scald.
Loose Pipe Connections
With power and water off, check the fittings at the top. A slightly loose connection may just need a snug turn with a wrench. Don’t crank it. If the fitting is corroded, cracked or still weeps after snugging, it needs replacing, and if it is a soldered copper joint, that is plumber territory unless you already know how to sweat a pipe.
A Dripping Drain Valve
A drain valve that drips when closed may only need tightening. If that fails, it can be replaced after the tank is drained below the valve. Brass valves generally outlast plastic ones, and a quick check of the manufacturer’s model information tells you what thread size you need.
The T&P Relief Valve
This valve is a safety device. It opens to release pressure or heat that would otherwise build to dangerous levels, so a leak here is a signal, not just a nuisance. Before swapping it, ask why it opened. Two common reasons are a failed valve and excess water pressure.
High water pressure puts extra strain on the tank and the relief valve. One manufacturer’s installation manual says supply pressure should not exceed 80 psi, and that a pressure reducing valve or expansion tank may be needed if it does. A cheap pressure gauge screws onto a hose bib so you can check. If you read high, a plumber can look at the pressure regulator.
Two hard rules. First, relief valves are safety devices and should never be used to control normal thermal expansion in a plumbing system, so don’t cap, plug or restrict one to stop a drip. Second, if the valve is discharging steadily, shut the heater down and call a plumber.
What You Cannot Fix
A cracked or corroded tank is a replacement job. So is any leak where you can’t trace the source after careful drying. If you are weighing repair against replacement, a leak at a fitting on a young heater is worth repairing. A leak at the tank on an older unit is not.
How Long Will a Leaking Water Heater Last?
No honest source can give you a number of days. A fitting leak can be repaired and the heater carry on for years. A tank leak can worsen from a drip to a flood without warning, which is the sudden failure ENERGY STAR describes. Our practical advice: once the tank itself leaks, turn the heater off and don’t run it again.
If you are replacing, ENERGY STAR’s guidance on replacement timing is a good place to read up on what to look for and why planning ahead beats an emergency swap. Having the old unit hauled away and the new one installed during business hours is nearly always easier than doing it on a flooded Sunday.
When to Stop and Call a Professional
Call a licensed plumber when:
- the leak is a steady stream, spray or large puddle
- the water is near the breaker panel, outlets or wiring
- you smell gas (leave first, then call the gas utility)
- the tank or base is the source
- the T&P valve keeps discharging
- you can’t shut off the water supply
Call a water damage restoration service when the flooding has spread. Kentucky Farm Bureau recommends stopping DIY efforts if the damage is extensive or affects electrical equipment, and calling a restoration company. If the electrical panel got wet, stay out of the water and have an electrician check it before you restore power.
If you are renting, tell your landlord or property manager right away, in writing, with your photos. The heater is typically their responsibility, and a delay can complicate who pays for damage.
Prevent the Next Leak
A few habits cut the odds of a messy repeat.
- Add a drain pan. The manufacturer’s manual recommends a pan no more than 1 3/4 inches deep and at least 2 inches wider than the heater, connected to an adequate drain. The same manual says the maker won’t take liability for water damage from a leak, so a pan protects you.
- Check your water pressure once a year with a simple gauge and keep it in the recommended range.
- Look at the heater every few months: the base, the fittings, the T&P discharge pipe and the floor around it.
- Don’t ignore early warnings. Small weeps and rust-colored streaks at fittings are cheaper to deal with now than after a failure.
- Know your shutoffs. Find the cold-water valve and the breaker or gas valve today, and label them.
While you are checking pressure, you may notice trouble elsewhere in the house. Our guide on why shower pressure drops over time explains how scale and supply problems can show up at the fixtures, which is useful context if your pressure reading is odd.
Our Perspective: Fix the Cause, Not Just the Drip
We write for people who would rather understand a problem than pay someone to hand-wave it. With a leaking water heater, that means two things.
First, the safe first move is always the same: cut the power or gas and the water, and take photos. It costs you nothing and it limits the damage. Second, the diagnosis decides everything. A weeping fitting is an afternoon job. A leaking tank is a replacement, and trying to nurse it along is how a $50 problem becomes a ruined floor.
We are also firm about where DIY ends. Gas, wiring, a relief valve that keeps discharging and a flooded space are all moments to stop and bring in a licensed pro. Knowing that line is part of being handy, not a failure of it. If you’ve done the shutoff and the drying test, you can describe the problem clearly to a plumber, which usually means a faster, fairer visit.
More Plain-English Fixes for Your Home
A leaking heater is rarely the only thing a house throws at you. Fix It Daily has step-by-step guides for everyday plumbing, electrical and connectivity problems, each with clear safety warnings and advice on when to call a pro. If a breaker tripped when the heater acted up, start with why a circuit breaker keeps tripping, or browse the full library on the Fix It Daily homepage.
If a slow drain is next on your list, our guide to fixing a slow sink drain walks through it the same way.
FAQ
Can I Still Use Hot Water If My Water Heater Is Leaking?
No. Turn off the power or gas and the cold-water supply, then contact a professional. Even a small leak can cause real water damage and mold, and it may be a sign of a bigger failure. If you must wash, heat water on the stove rather than running the heater.
Why Is My Water Heater Leaking From the Bottom?
It may be the drain valve, or water from a fitting or T&P valve above running down the tank. If the water comes from the tank base itself, corrosion has likely eaten through the steel. That requires replacing the heater. Dry the area and watch to see where fresh water first appears.
Can I Fix a Leaking Water Heater Myself?
Sometimes. Tightening a loose connection or replacing a faulty drain valve are common DIY repairs. A cracked or corroded tank can’t be repaired. Leave gas lines, wiring and repeated T&P valve discharge to a licensed plumber.
Is a Leaking T&P Valve Dangerous?
It can be. The valve exists to release dangerous pressure or heat, so a leak may mean either is too high. Don’t plug or cap it. Shut the heater down and have a plumber check the cause, including your home’s water pressure.
Does Insurance Cover a Leaking Water Heater?
That depends on your policy and on whether the damage was sudden. Document everything with photos and video before cleanup, and keep the old unit until the adjuster inspects it. Contact your insurer or agent promptly to ask what is covered.
Sources
- A. O. Smith: What to do when your hot water heater is leaking
- A. O. Smith: Why is my water heater leaking?
- ENERGY STAR: When should you replace your water heater?
- Servpro: What to do if your water heater is leaking
- Kentucky Farm Bureau: What to do if your water heater leaks
- wikiHow: Why your water heater is leaking
- California Energy Commission filing: atmospheric vented water heater manual
- International Code Council: Water heaters
Recommended
- How to Fix Low Water Pressure in a Shower
- Why Your Sink Drains Slowly (And How to Fix It)
- How to Stop a Toilet From Running
More Fixes From Fix It Daily
- How to Get Rid of Drain Smell (And Keep It From Coming Back)
- Why Your Dishwasher Isn’t Draining (And How to Fix It)
- Why Your Garbage Disposal Is Humming (And How to Fix It)
- Why Your Refrigerator Isn’t Cooling (And What to Check First)
- Wasp Nest Removal: When to DIY, When to Call a Pro
- How to Fix Slow Wi-Fi at Home
- Why Your Laptop Overheats (And What to Do About It)
- How to Stop a Door From Squeaking
- Peeling Paint: Why It Happens and How to Fix It for Good
- GFCI Outlet Won’t Reset? Causes and Safe Fixes to Try First
- How to Fix a Leaky Faucet: Find the Cause and Replace the Part
- Dryer Not Heating? 7 Causes and Safe Fixes to Try First
- Smoke Detector Chirping? Causes and How to Stop It Safely
- How to Unclog a Toilet: Plunger, Auger, and When to Call a Pro
- No Hot Water? How to Find the Cause and Fix It Safely
- Furnace Not Turning On? Safe Checks to Try Before You Call
- Frozen Pipes: How to Thaw Them Safely and Stop Them From Freezing